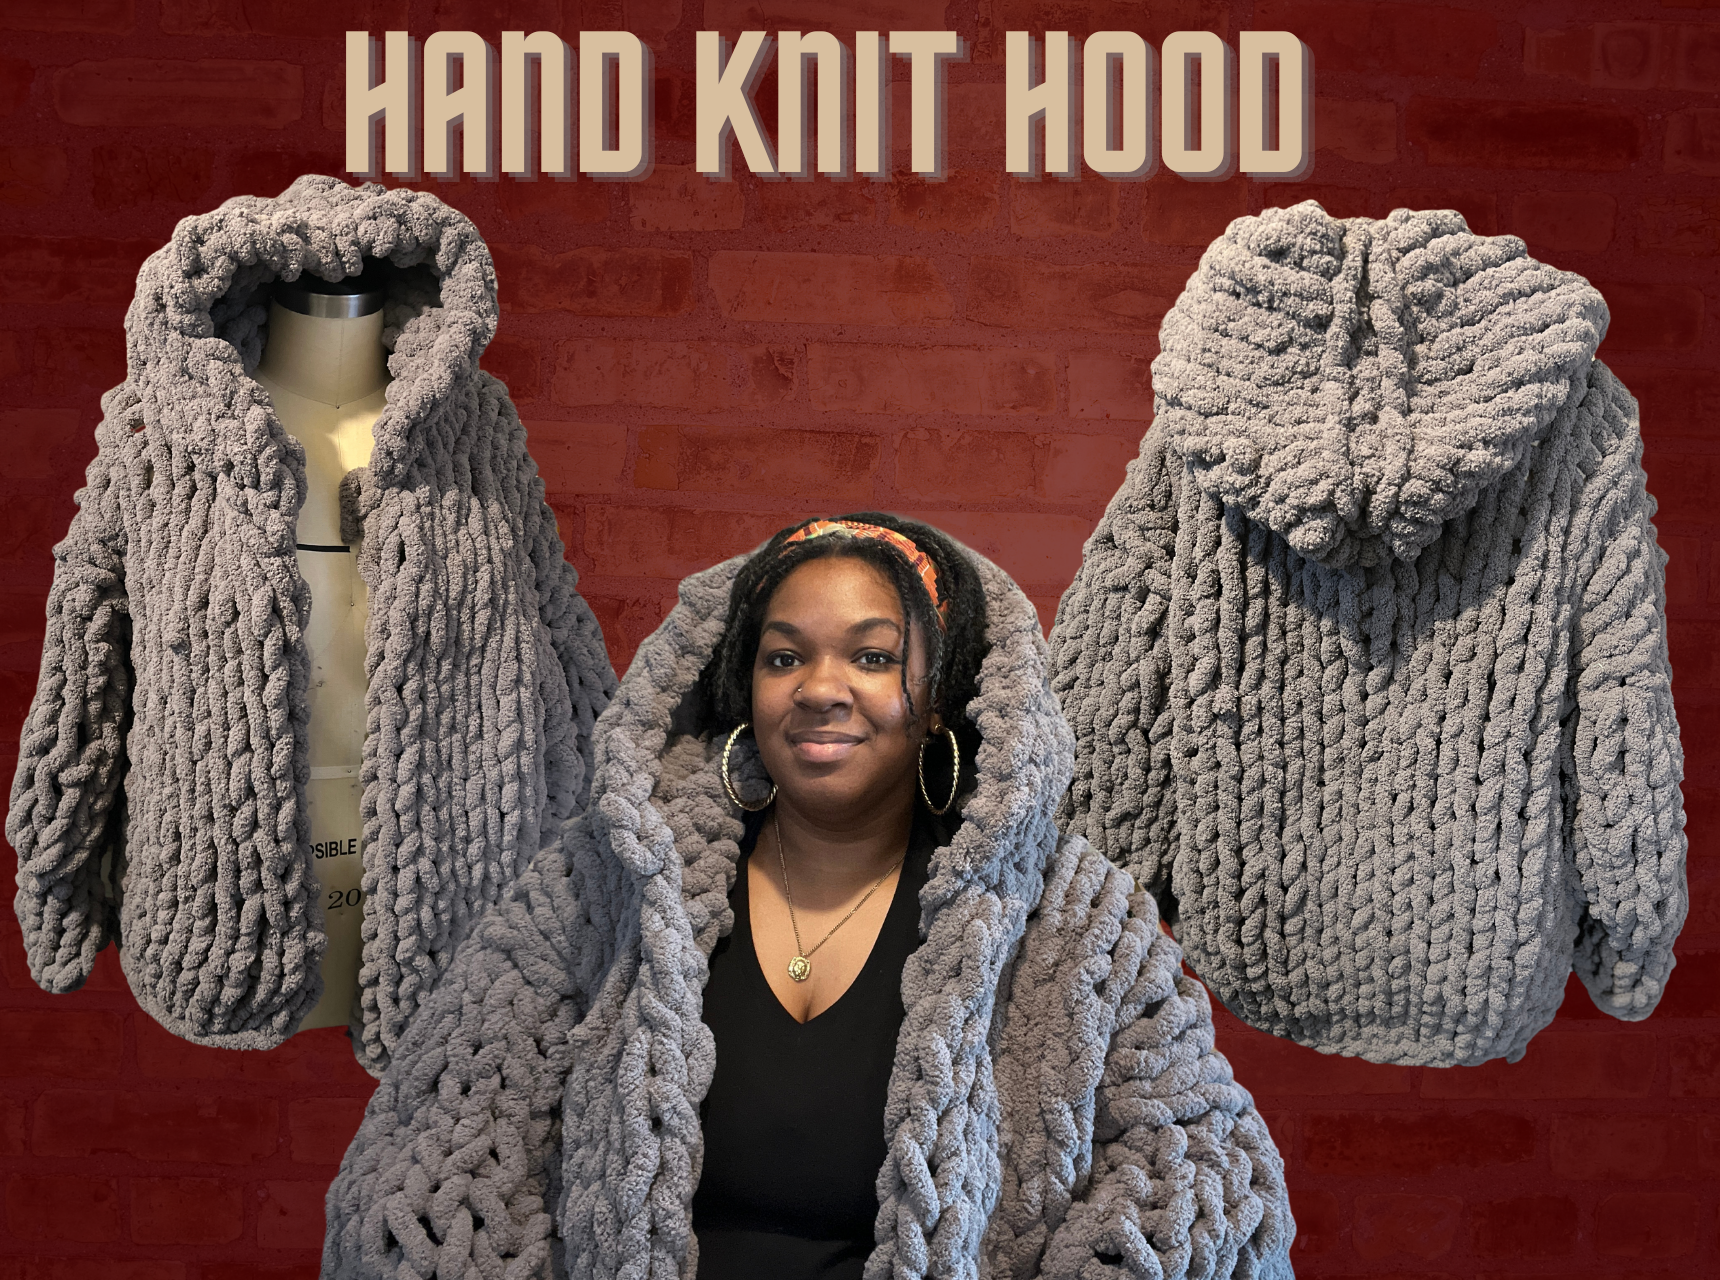
hAND kNIT hood for cHUNKY knit jacket
Elevate your chunky knit jacket with a hand-knitted hood effortlessly. Discover how to add coziness and style to your garment with this simple yet super cozy technique.
There may be affiliate links in this description or video
Well, hello there, my beautiful friends! Today, we're diving into a delightful topic close to my heart: adding a hood to those lovely hand-knit blanket yarn sweaters. Can you imagine the warmth and style? Oh, honey, it's a vibe! Now, let me share a little secret: this is all on video on my YouTube channel already. So, grab your yarn and get ready to level up your knitting game. Let's sprinkle a little magic onto those cozy creations and make 'em even more fabulous. Are you ready? Let's dive in.
Hand Knitting Sweaters
Embark on a journey of creativity and relaxation with hand-knitted sweaters, enriched with the cozy allure of hand-knitted hoods. With a series of successful YouTube videos under my belt, I've discovered the magic of hand knitting that surpassed my wildest expectations. Through four sweater projects, each stitch has been a lesson learned, especially in mastering the art of crafting hoods. Hand knitting offers a serene escape, where once you start, you'll find it remarkably easy to immerse yourself in. Recently, during a hand knitting class, the joy was palpable as we effortlessly crafted sweaters, completing them in under six hours! Join me in discovering the tranquility and satisfaction of hand knitting, elevated by the charm of hoods.
Adding a Hand Knitted Hood
To begin you’re going to knit your sweater the same as shown in my previous blog post and YouTube. See HERE.
Tools: The hood actually takes quite a few yards of yarn. I started with a 72 yard Bernat Blanket Yarn skein. Here is a link to one. BLANKET YARN AMAZON I used little less than half of the skein. I did 17 rows this time.

You can do the hood last. I would actually suggest it. Because my 1st time I did the hood 1st and the sleeve last. I ran out of yarn and couldnt finish the sleeve!!!

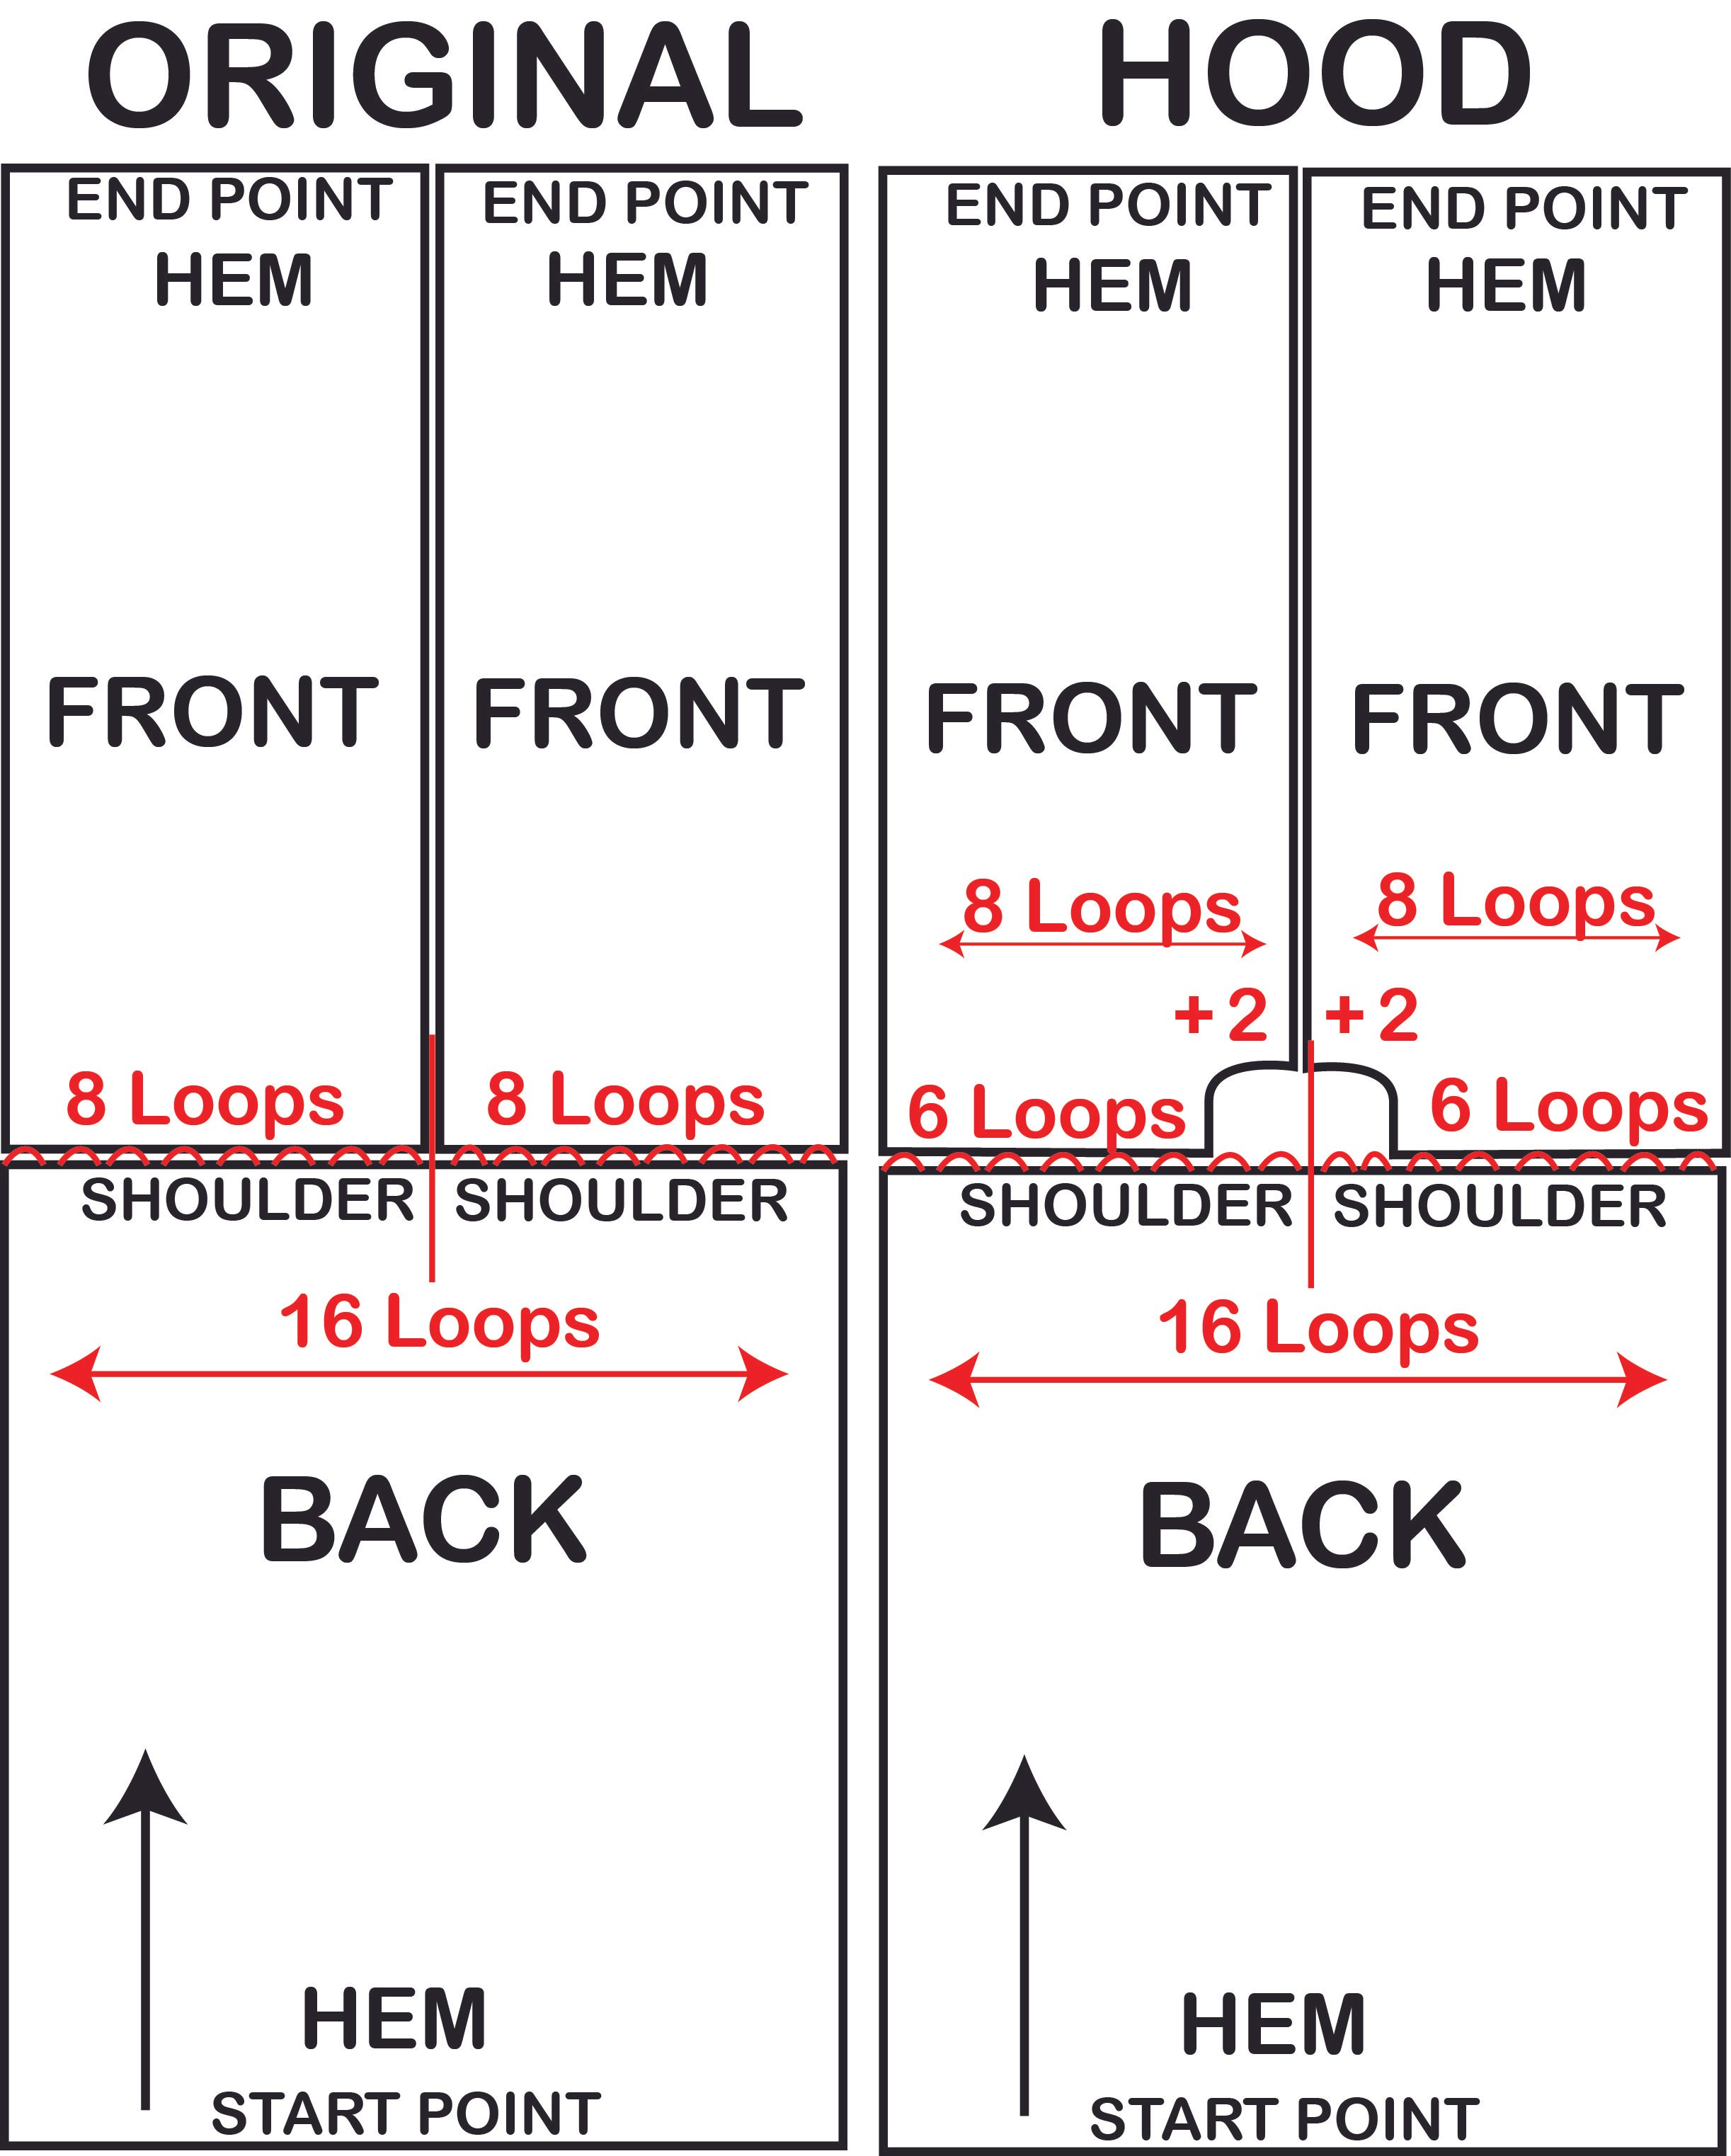
The difference between the hood and no hood:
With the standard sweater when you reach the shoulder. You will split the number of loops you have in half. Then youll continue to hand knit one front panel and then insert a yarn and the knit the other front panel as below.
For the Hood, you’ll need to save 4-5 loops at the center of the shoulder this will be your “Neck Width”. Then preferably have equal amount of loops on the left and right side of the shoulder as shown below. Then you will knit 2-3 rows to create a “Neck Drop) |not hand knitting the 4-5 loops saved in the middle| Then you will add 2-3” loops at the center front edge . To basically add those loops back to the rest of the body width.
Here is a demo of Creating a Neck width and Neck drop for a hood.
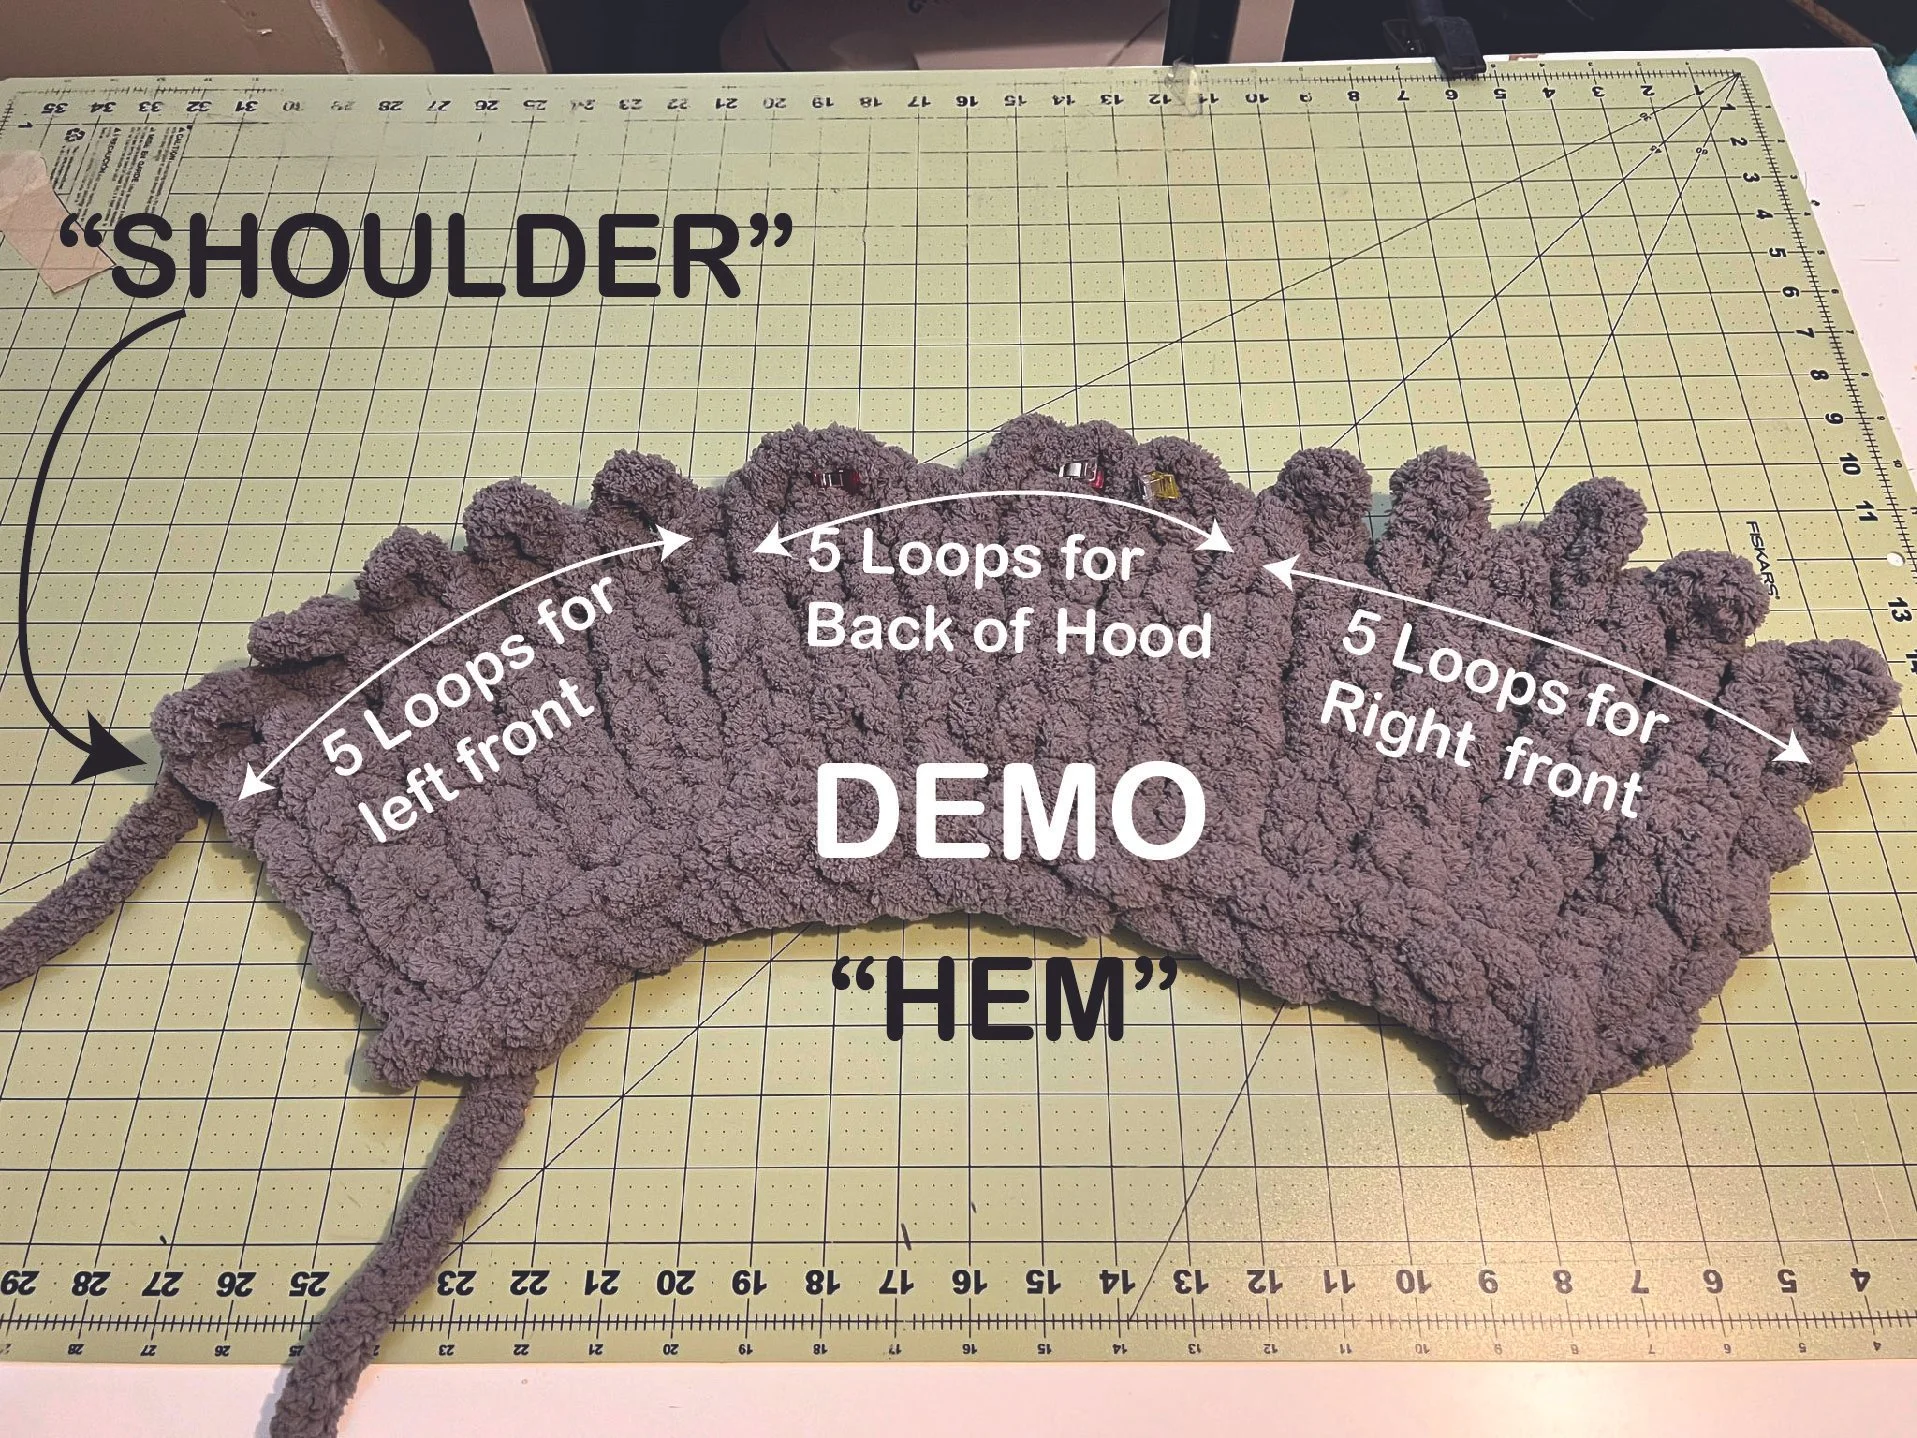
So for the demo I had 15 loops, and I split it in 3. 5 loops for each shoulder and 5 loops for the neck width.
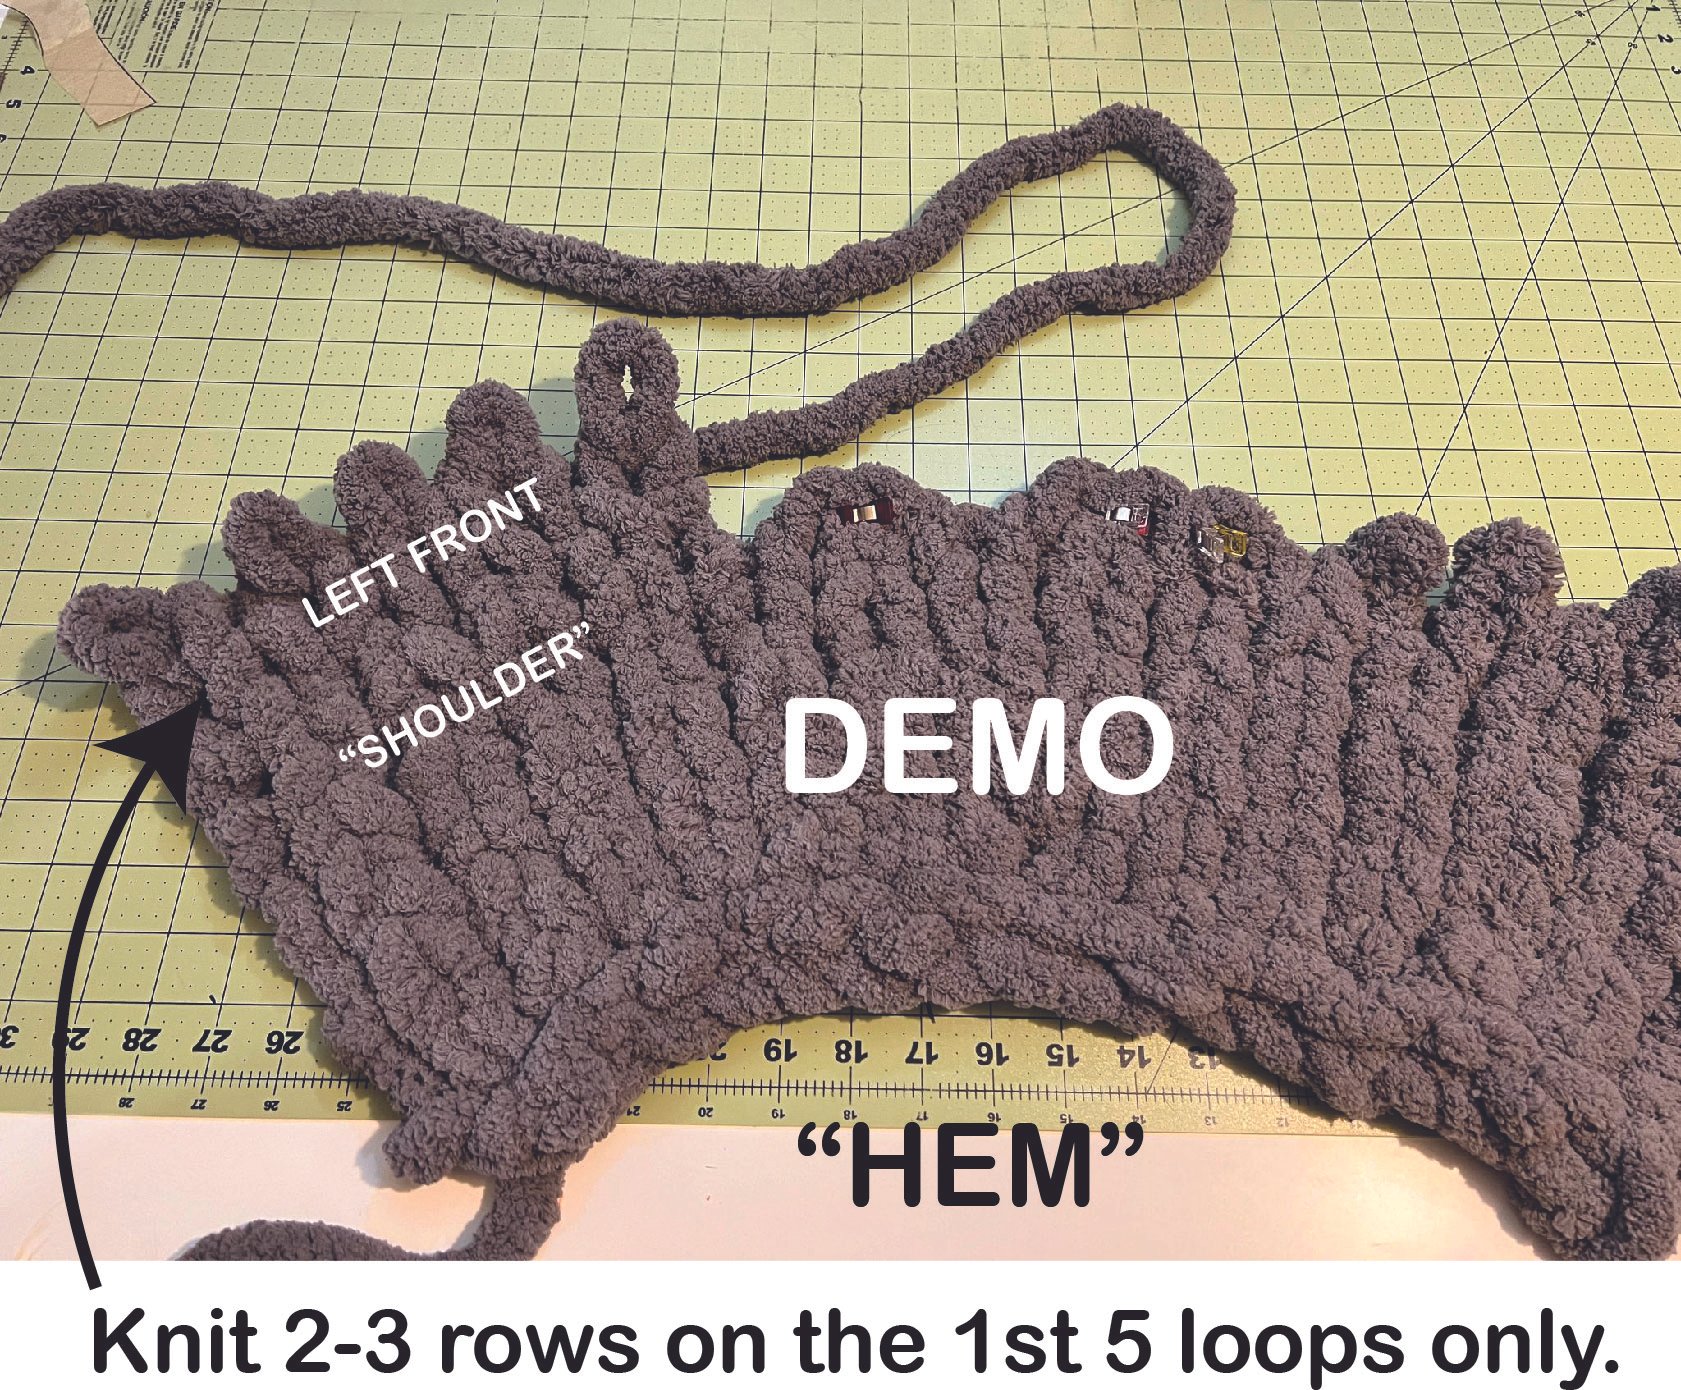
Only knit one shoulder to start creating the neck drop 2-3 rows is more than enough. Once you get to the front edge of your 2nd or 3rd row. Then we are going to create a slip knot. Same as the slip knot we do at the hem to start hand knitting. See step by step today.
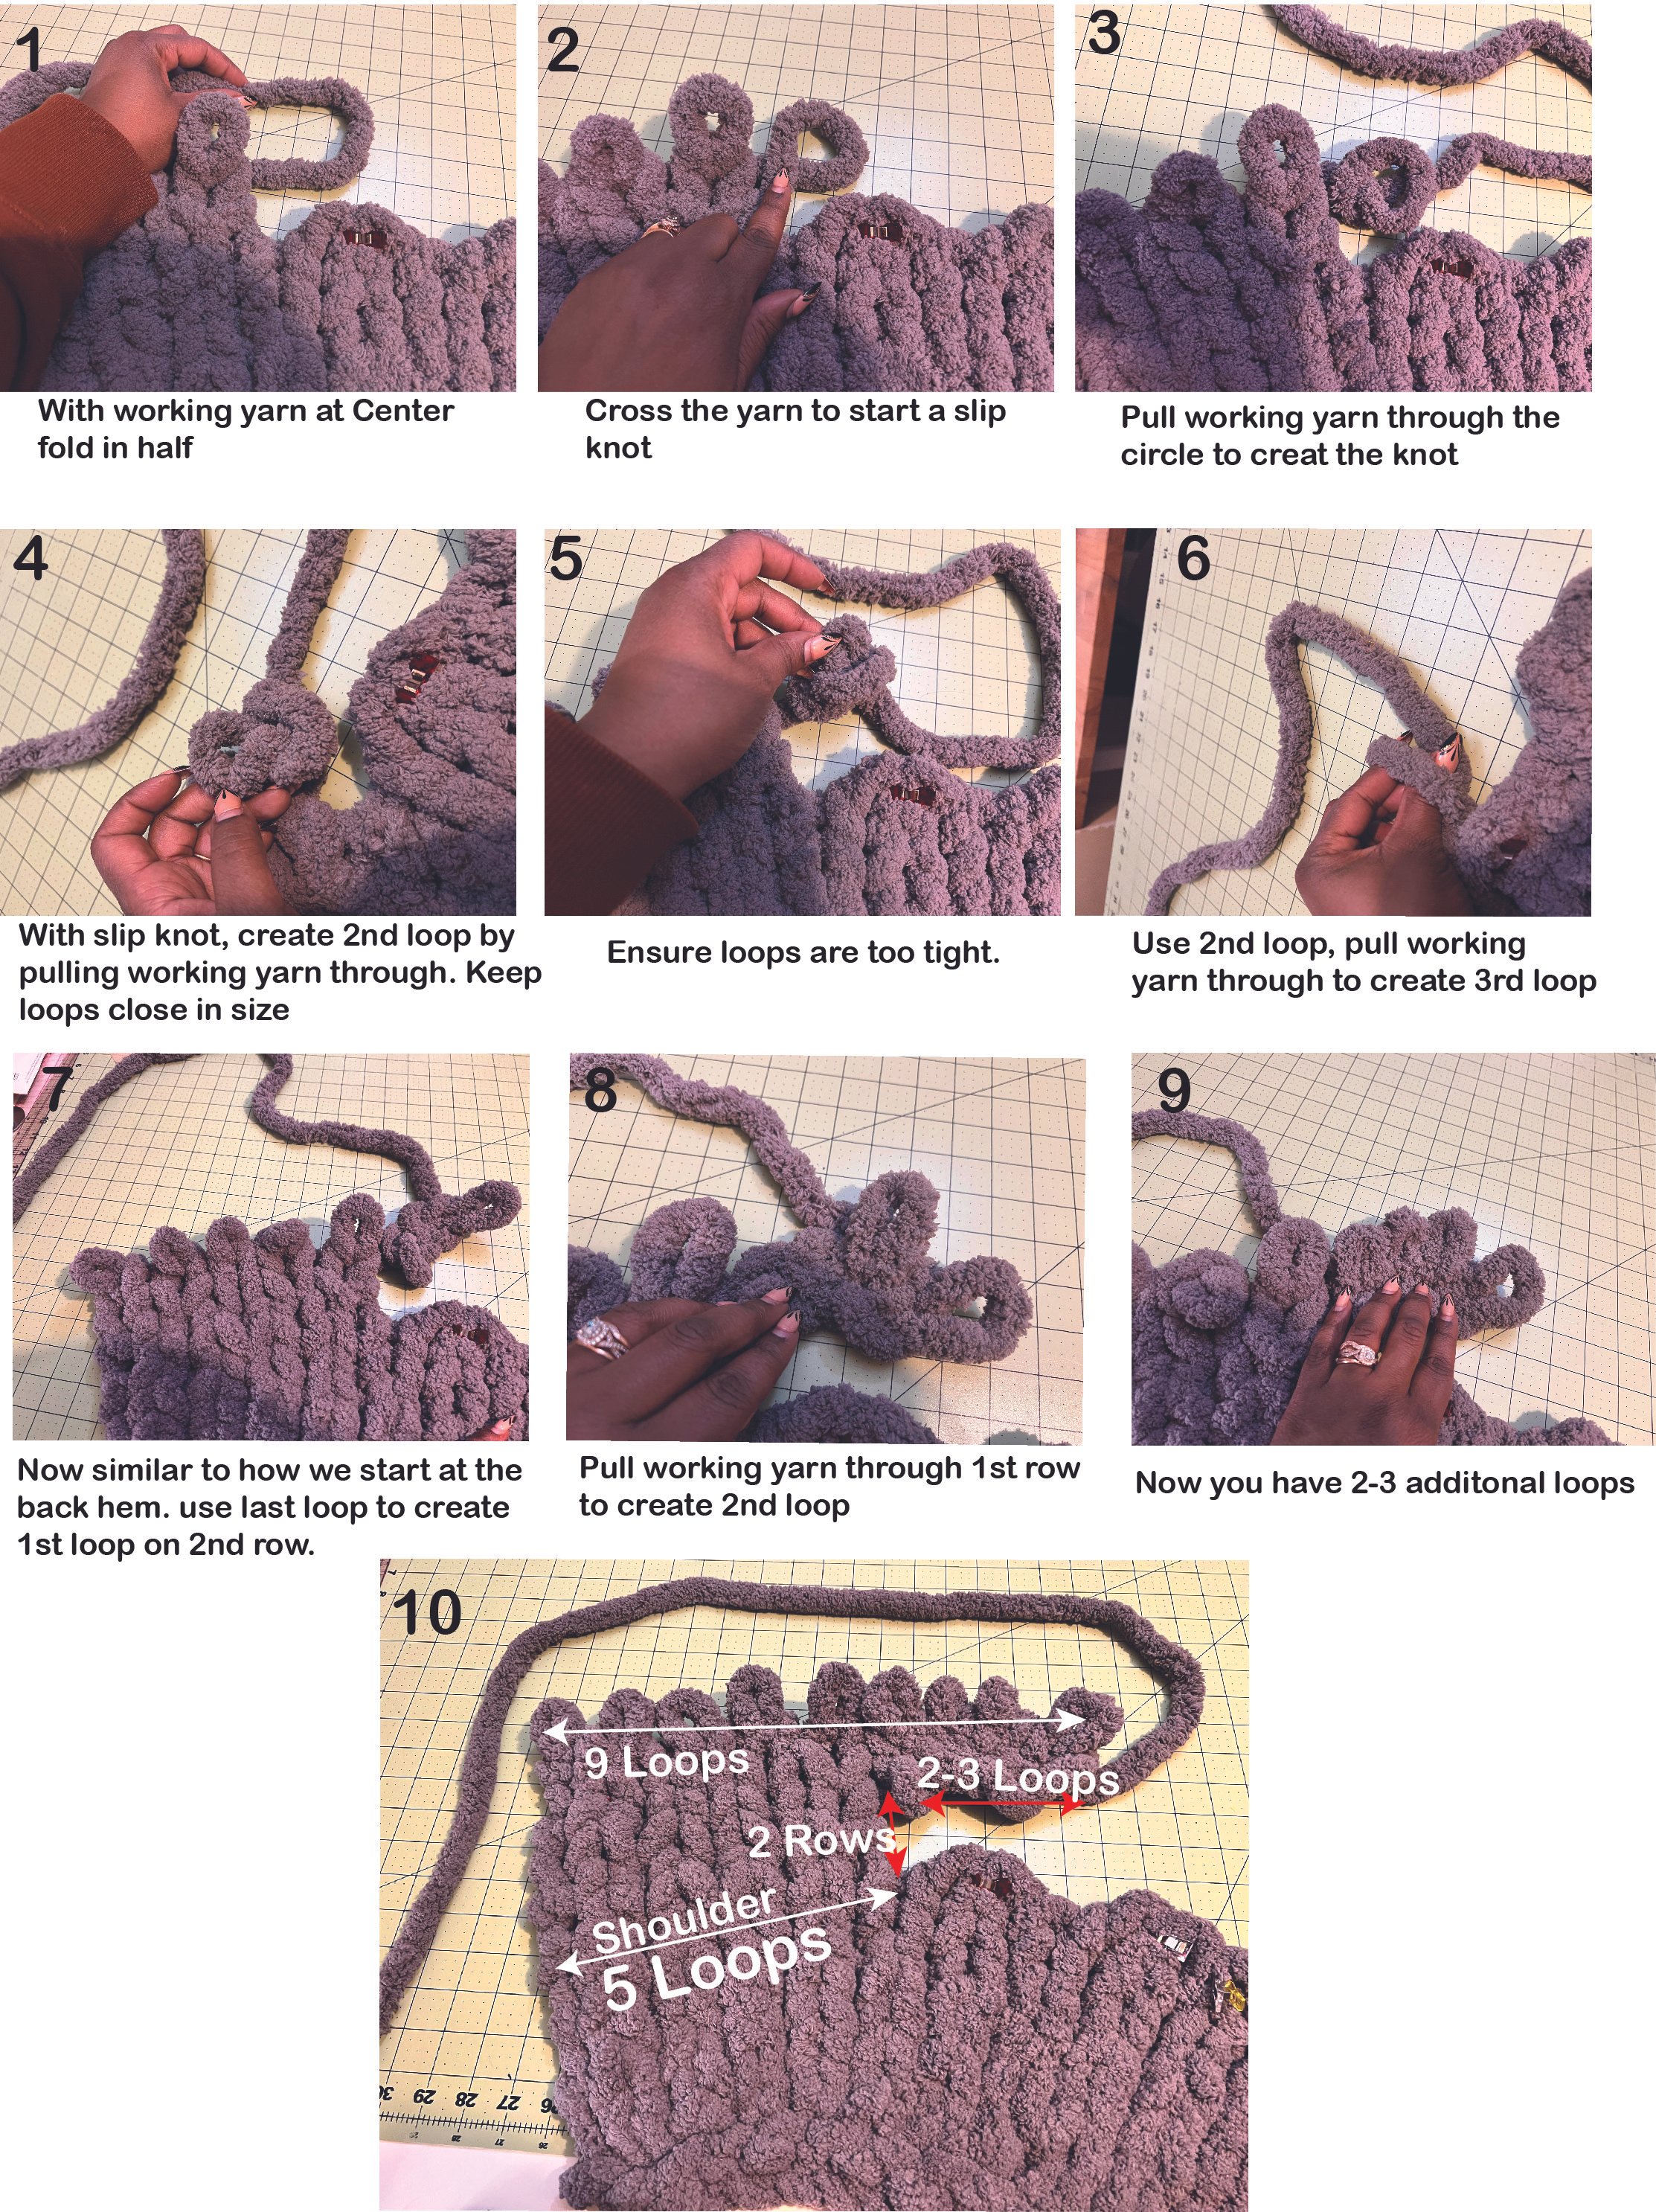
The distance between your shoulder and now new front bodice edge is your neck drop!
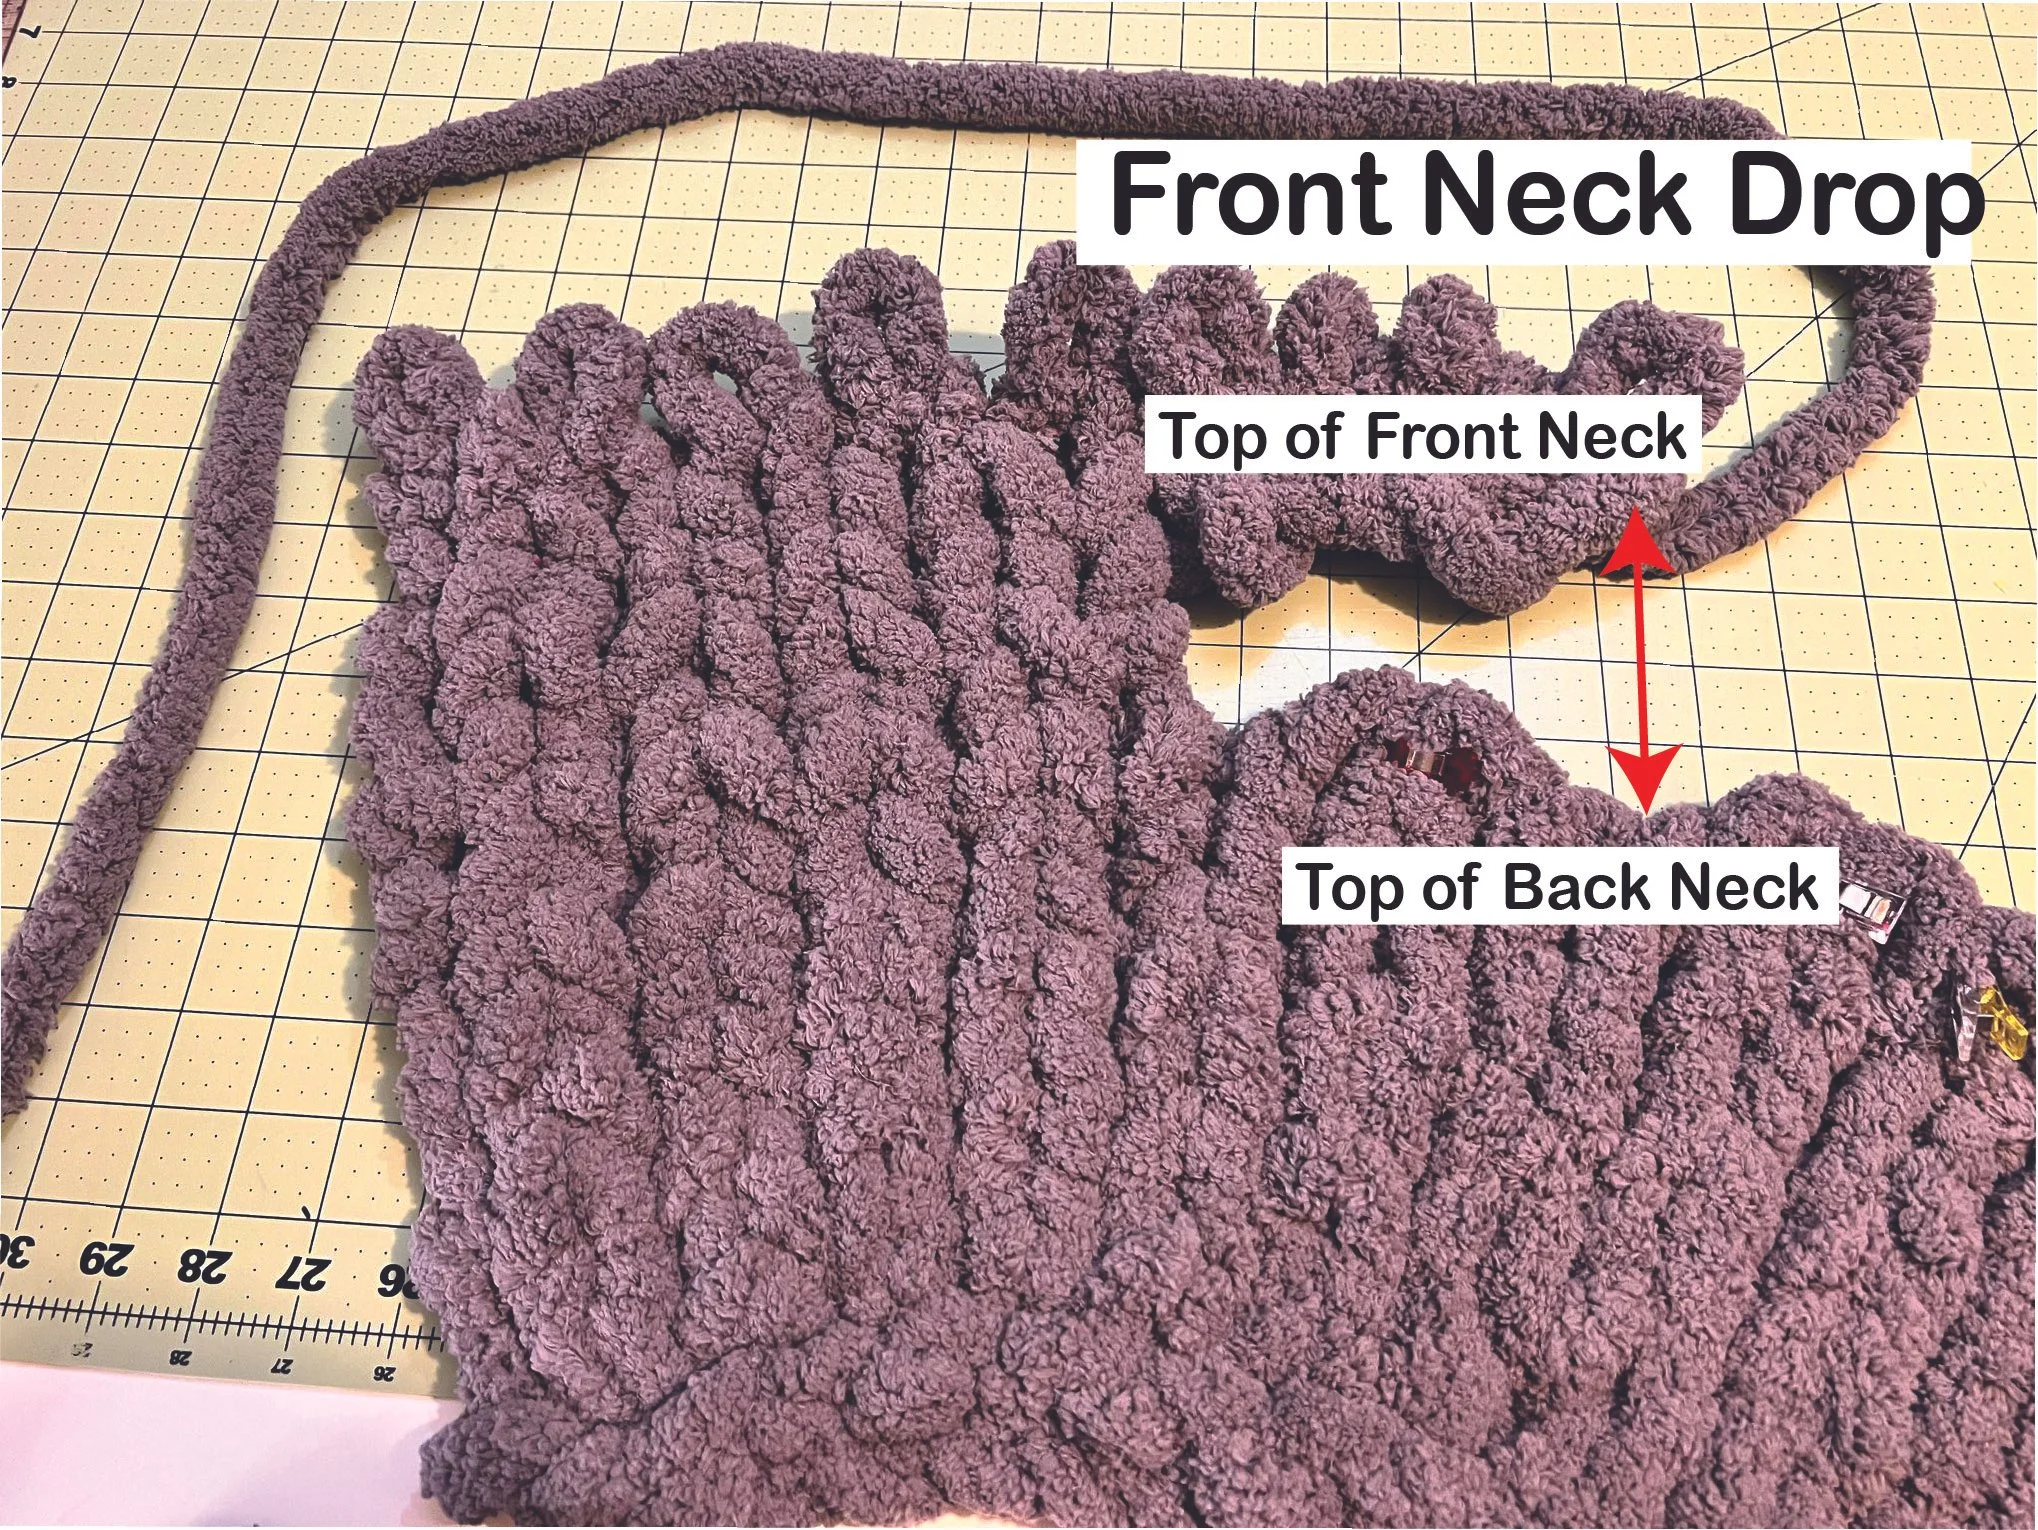
Once you have added your extra loops. And you are back to have the same amount of loops as your half of the loops at your shoulder. You then will continue hand knitting down the the length you need to match with the back length. Then add your sleeves as shown in separate blog/video. You get something that looks like this.

Once you have finish your body, we will NOW actually start the hood. 1st thing we are going to do is insert a yarn into the edge of the front. Ensure to follow your same pattern to keep the knit stitches on the outside and the pearl stitches on the inside.

Then you will continue to add loops by insert the yarn into the top edge of the front neck edge. Once you get to the back neck where we saved those “5 loops” we will loop the working yarn through like normal until we get to the other front edge. Then we will create new loops just like on the 1st front panel. See quick video below.

Once you have complete the amount of row needed. You will cast off as shown in previous videos/blog post. This Time you will need to leave a longer tail at the end of the cast off. As we will fold the rectangle in half with right side together. And then take the long yarn and begin to weave in and out of the loops of the cast off to “STITCH” them together. Here are some images but also a link to this specific part on YouTube.