

Hand Knit Chunky Sweater: A Cozy DIY Project for Beginners
Join us in crafting a hand knit chunky sweater with this easy-to-follow DIY tutorial. Perfect for beginners, create a cozy, oversized sweater tailored to your style!
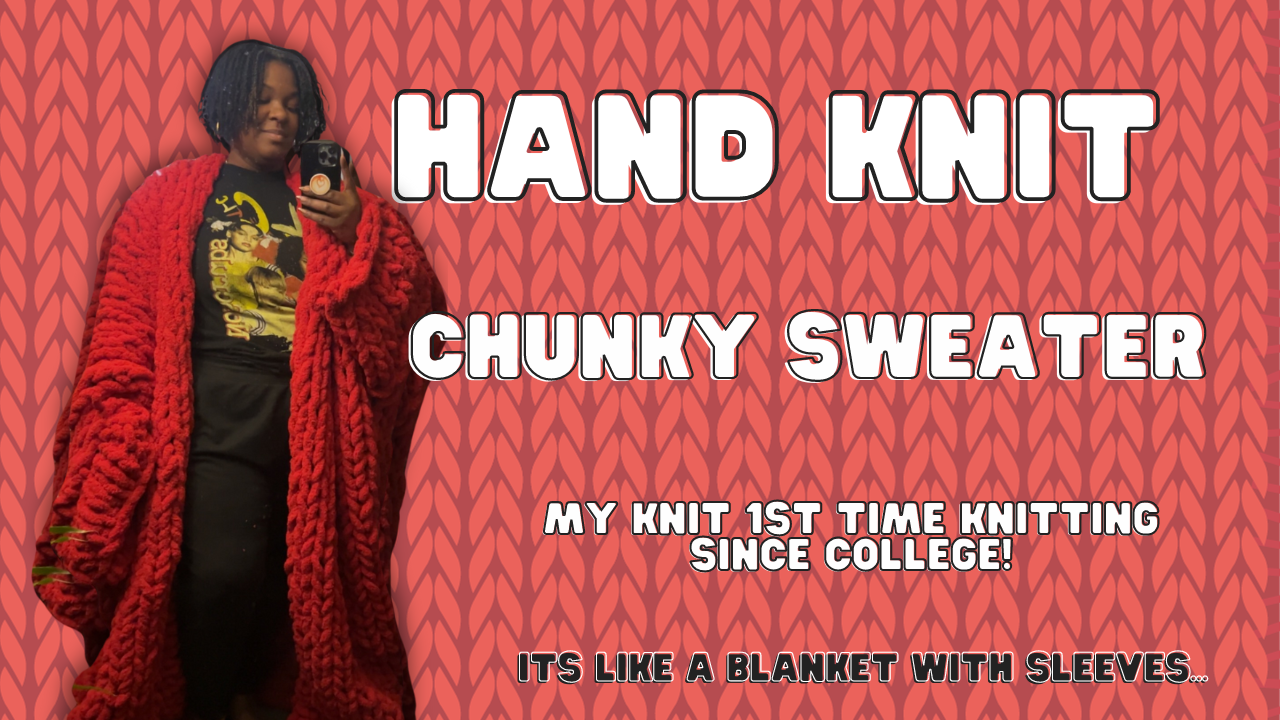
Hand Knit Chunky Sweater
Hand Knit Chunky Sweater Maxi
Hey there, crafty friends! Have you ever seen those gorgeous, oversized hand knit chunky sweaters and thought, "I need one in my life"? That's exactly how I felt when I stumbled upon these maxi-length knit wonders. So, I decided to take the plunge into hand knitting, and let me tell you, it's easier than you think! In this blog, I'm going to walk you through how I made my very own hand knit chunky sweater, and how you can make one too.
Getting Inspired and Prepared
Like many great projects, this one started with a bit of online inspiration. I hadn't touched knitting since my college days, but the urge to create was strong. After a bit of encouragement from my followers and some YouTube research, I was ready to embark on this cozy adventure. The key? Finding the right yarn. I went with Yarn Bee from Hobby Lobby, but there are plenty of options out there. If you're plus-sized like me or just love an oversized look, you might need more yarn - I used 17 skeins in total!
Setting Up Your Project
First things first, you need to decide the dimensions of your sweater. I aimed for a 30” width and a maxi-length of around 60”. Remember, it's all about customizing to your own style and comfort. Start with a slip knot and work your way through creating the hem by pulling the working yarn through the loop until you reach your desired width.


Knitting Your First Rows
Now, the fun part begins! Start knitting your first row by pulling the yarn through the loops you just created. Keep the yarn flowing in the direction you're knitting, and continue making rows back and forth until you reach your desired length. A pro tip here: consistency is key, especially with your loop sizes.
Adding Colors and Joining New Yarn
Feeling creative? Add in different colors whenever you like, but make sure to leave tails for tucking in later. Ran out of yarn? Simply tie the new thread to the end of the old one. It's that easy!
Creating the Front Panels and Finishing the Edges
Once you reach the desired length. From the bottom edge to what will be your shoulder. Divide the loops in half to start working on the front panels. This part requires some attention to detail, but it's nothing you can't handle! Continue knitting up from the back to start ONE SIDE OF FRONT. So if its 10 loops. You will leave 5 loops untouch and continue to knit the 5 loops on one side, until it is the same length as the back. When you're ready to finish the edges of the one side, use a simple cast off technique to create a neat braid-like effect. Then you will go back to those 5 loops you left . Ensure to leave a long tail. Then start looping side to side like on the other front panel.
Crafting the Sleeves and Finishing Touches
Once you have the back panel and front two sections complete. Now we need to “stitch” or Link the side seams together. For my sweater I stop stitching the front and back together at the side seam 12” below the fold/shoulder. For the length below the 12” to the hem. I cut a long piece of yarn about 3 times that length. I grabbed two loops at the bottom hem. One from the front and one from the back. And I loop my long yarn which is now my working yarn and tied a knot at the hem. Then I start grabbing one loop from the front and one loop from the back. Took the yarn and pulled it through. See video…. I stopped at 12” below the fold.
For the sleeves, start by creating a loop with your working thread and inserting into the edge of the front panel. Then continue to grab loops off the front/back panel to put a loop through from your working yarn. So you can knit a circular pattern for a sleeve. And then you’ll continue this until your sleeve gets to the desire length. Then you’ll use the same castoff technique. Remember, if you need to try on your sweater but are worried about loops slipping out, just use safety pins to secure them.

Final Thoughts and Tips
Creating your own hand knit chunky sweater is not only rewarding but also incredibly fun. This project I did over 3days at about 2 hours each day so close to 6-7 hours. Whether you're new to knitting or an experienced crafter, this project is perfect for a cozy weekend. Don't be afraid to experiment with colors, lengths, and styles. After all, this is your creation!
Ensure to knot all your stray yarns and weave them into the garment !
Excited to start your own hand knit chunky sweater project? Share your progress, tips, and final creations with us!
JOIN my COMMUNITY: CLICK HERE TO JOIN MY FACEBOOK SEWING GROUP!
FAQ?
What to do if I drop a loop hand knitting?
- I did this quite a few times. I ended up just grabbing the loop and pulling it into the loop about. Then took some spare yarn and tied a knot around them
