DIY TOTE BAG
"Embrace your creativity and step into the world of do-it-yourself fashion with a fun and practical project: making your very own DIY tote bag! Whether you're a seasoned crafting enthusiast or a complete beginner, creating a tote bag from scratch is a fantastic way to express your personal style while also reducing your environmental footprint. With just a few basic materials, a dash of imagination, and a sprinkle of passion, you'll embark on a creative journey that not only results in a functional and fashionable accessory but also fills you with a sense of accomplishment. So, roll up your sleeves, gather your supplies, and let's dive into the delightful art of crafting a tote bag that's uniquely yours!

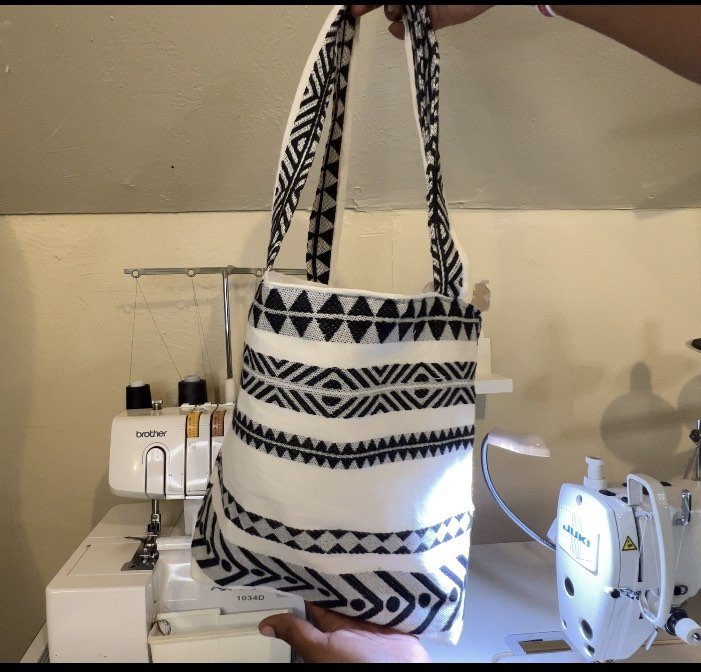
I upcycled some fabric for this project! How cute is this mini tote bag.
To complete this project, you will need the following tools and materials:
1.5 yards of fabric (1 yard for the exterior and 1/2 yard for lining). Cotton works best, I upcycled some fabric for this and it still worked great.
1/2 yard of interfacing
Sewing machine
Scissors
Loop turner or safety pin
Point turner
Measuring tape
Iron
Cut two 18x18” squares of your outside fabric and 2 of your lining. (Or 4 if they are all the same). And Cut two 4x26” rectangles for the straps. ( Square size can be any dimension based on preference)

2. Cut 2 18x18” squares of interfacing.

3. Take your two outside fabric squares and press the two interfacing on to them.

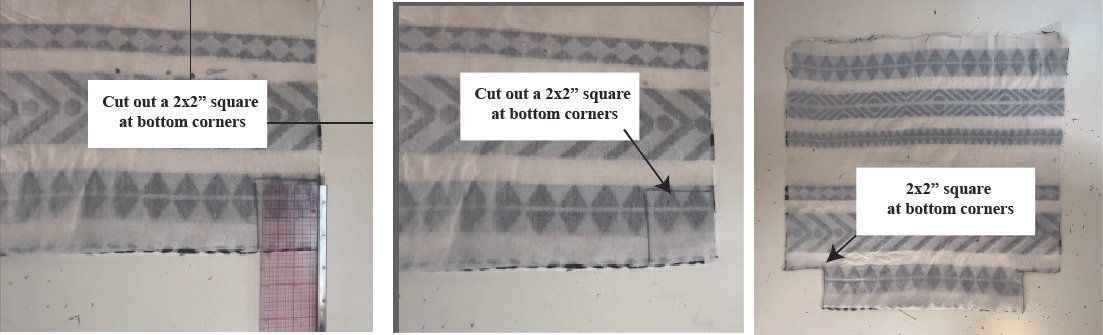
4. Take your two interfaced and two lining squares and cut out 2x2” squares out the bottom two corner only.
5. Sew both squares together right sides together with 1/2 seam allowed down both sides and the bottom

6. At the bottom, you need to pin the side seam to the bottom seam. Then sew straight across across with 1/2 seam allowance. Do this for the lining and outside fabric. Use your point turner to make sure you corners are all the way out.

7. Take your straps fabric and sew with right side together 1/2 down the long side. Then flip inside out and using your loop turner or safety pin then press.

8. Flip your outside fabric bag so that right side are facing out. Take your lining bag and put the outside fabric bag inside of it. Ensure right side are together and side seams are aligned.

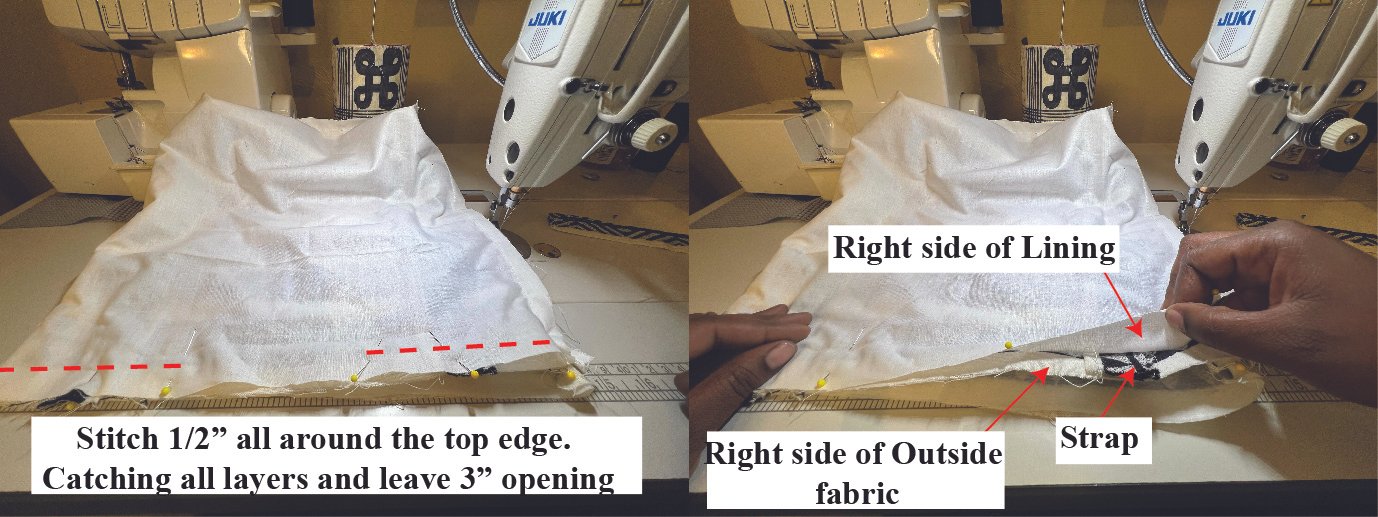
9. Take your straps and insert them in between the two layers ( where the rights side meet). Placing them
2” from the side seam. Sew 1/2 along top edge through all the layer with 3” opening.
10. Put your hand through the opening and start pulling the outside of the bag through the opening. Until
the entire bag is right side out. Then push the lining inside.
11. Fold your seam allowance from the opening inside the bag and then topstitch along the edge.
Pull your straps upward when topstitching.

FINISHED! Give you bag a good press. Follow along via youtube at the link below.